In this article, we will present an innovative method of using Revit Lookup Tables and face based data cubes to tag any building elements in Revit projects.
See the full videos or read below on the steps to recreate this workflow and download sample files.
This method works best for companies that have design standards established. We will cover the steps to create a Data Cube family, an Annotation Tag family, a Lookup Table, and then populate the project file and tag elements.
In the example, we will simplify the Lookup Table creation by using Family Type Manager.
The Challenge and Solution
Revit does not provide a simple method of tagging system families and exposing the wall system layers and thinkness of each layer. Many times companies must indivudually tag each layer or create key schedules. In this example, we will create a Lookup Table that has all of our wall assembly layers. We will then load the Lookup Table into a Data Cube element and place the Data Cube on hosted walls. Finally, we will tag our walls with the Lookup Table values. The Lookup Table can hold hundreds of assembly types and the same family and tag can be used for floors, walls, ceilings, roofs, and any other building element. Just update the Lookup Table to update every tag value in the project.
Create the 3D Data Cube Family
Start by opening a Generic Model Faced Based template family.
Create an extrusion that is 1″ x 1″ x 1″ tall. The element we create can really be any shape and size.
Add the following parameters to the family.
[Show Data Cube] Type Based, Yes/No Parameter
[Assembly Type] Type Based, Text Parameter
[Assembly Function] Instance Based, Text Parameter
[Assembly Items] Instance Based, Text Parameter
Create the Lookup Table
WithFamily Type Manager, use the ‘Lookup Table Editor‘, and create your columns and rows of data.
Make sure the header parameter units match what is in the Revit family. Since we are using text values, all headers should use ##OTHER## as a suffix value. The Lookup Table column names do NOT have to match the names in the Revit family. *Revit is case sensitive. It is best to follow a standard that all Lookup Table column names have the same case formatting. We prefer to always use UPPERCASE for all column names.
The first column can be used for grouping data rows. In our case, we are grouping walls by EXT and INT conditions.
For our example, we are creating the following column header names and then adding the relevant information per row. Use [Alt]+ENTER key to create a multiline text element.
TYPE##OTHER##
ASSEMBLY##OTHER##
USE##OTHER##
Export the Lookup Table
WithFamily Type Manager, select ‘New Lookup File‘, and give the file a name and file path.
After providing a name, then click yellow button ‘Create New Lookup File‘. The file will be generated and ready for import into the Revit family.
Mapping Values to the Revit Family
In the Revit family, we only need to assign a few lines of information to the family.
In the [Lookup Table] parameter formula, type the name of the Lookup Table .csv file with double quotes on both ends. For our example, “Wall Types”
With the [Assembly Type] parameter enter a sample value. In this case “1A” without the double quotes.
Now we are going to reference the Lookup Table file name and the Assembly Type parameter value to determine what information will be shown in our annotation tag family. Enter the following values into each formula field for [Assembly Function] and [Assembly Items].
Open a generic annotation tag family and place two labels in the the top right quadrant of the reference planes.
Duplicate the tag family to make a new type with a revised name. Then change the formatting of the label. In our case, it is 3/32″ BOLD and has checkmarks for bold and underline. You can set the formatting to your choice.
The top tag received the label for the shared parameter “Assembly Type”
The lower label receives two shared parameters: “Assembly Function” and “Assembly Items”
Here is an image of the three shared parameters that were used. You can use any shared parameters that currently exist within your business.
Now, load the annotation tag into the project file.
Tagging Project Views
At this point, you have the 3D Data Cube and the annotation tag loaded into the project. The next step is to place the face based Data Cube along any surface of your Revit element and it will read the host name properties.
When placing the Data Cubes ensure you are setting the Assembly Type parameter to match the host name. In this case the wall types: 1A, 1B, 1C, 2A, 2B, 2C
Now use Revit tagging tool and hover over the 3D Data Cube. You can begin placing all wall type assembly layer tags throughout the project views.
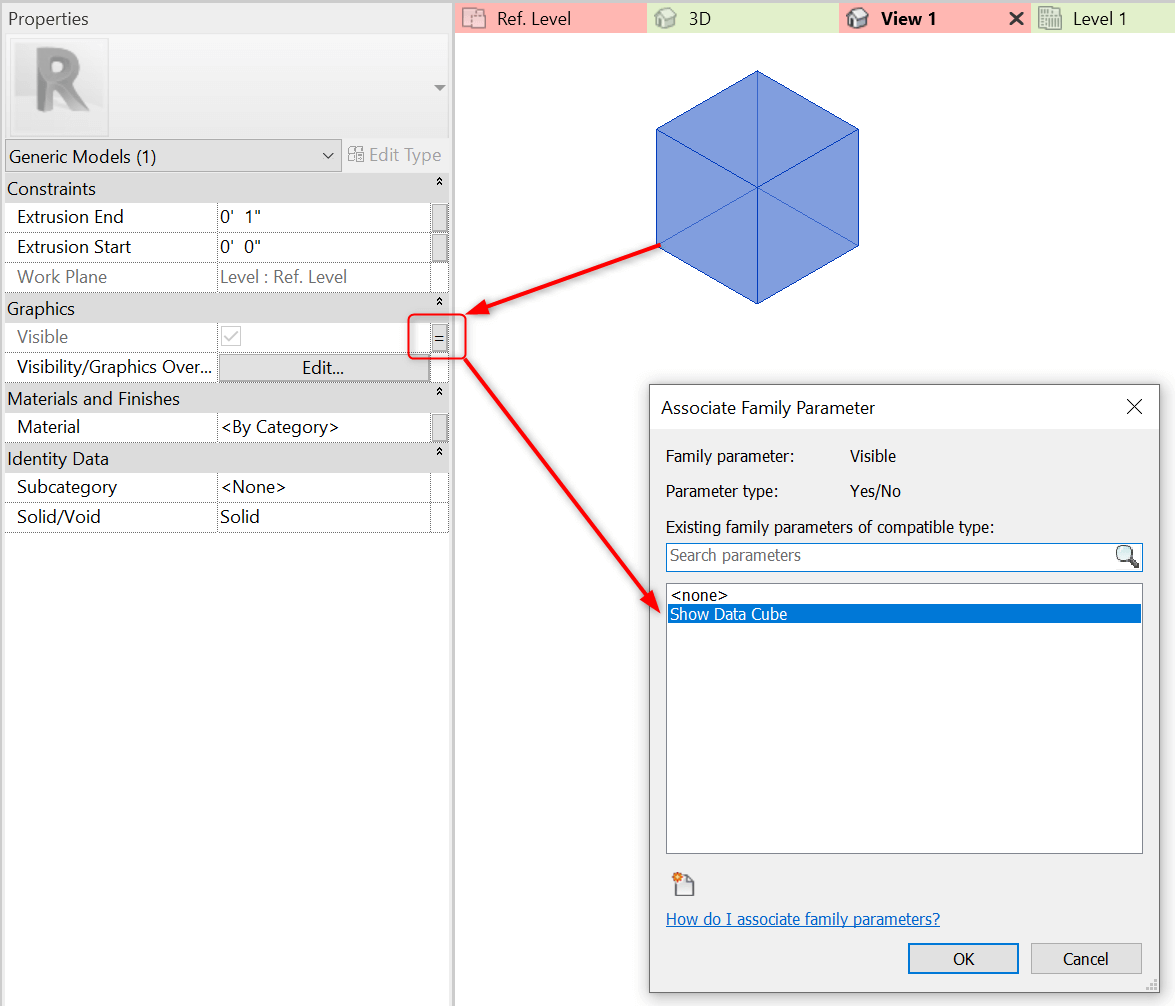
Hide the Data Cubes
To hide the Data Cubes, select the family in the project browser. Then right click and select Type Properties. In the Data Cube type properties, remove the checkmark for ‘Show Data Cube’. The Data Cube will now be invisible throughout the entire project, but your tags will remain. Move the tags anywhere you want for each view.
Tag Wall Layers
Updating Tag Information
With lookup table families, you have the ability to control all of your data in a single file. The significantly helps with quality assurance, control over assembly types, spelling, and other formatting of information.
To update the project, simply open the Lookup Table and edit the .csv file with the new or revised information. Load the Lookup Table back into the Data Cube family and save the file. Then reload the Data Cube family back into the project file.
You can also have all Data Cubes read the host families and update their values automatically. This eliminates the need for manual assignments. You can use an addin like ‘PropertyWizard‘ to keep all Data Cube values current during design changes.
Every tag will update in the project to reflect the new information!
BIModular provides professional technical consulting globally. Our expertise is in Revit DfMA, modular design and fabrication, creating data management systems, technical training, Revit content creation, and LOD 350+ shop drawings.